
Hello Dynamics Community !
The dream come true… As a consultant from 10 years now on Dynamics 365 technology, I alway struggle to connect CRM and ERP together. On the top of CDS and CDM with new features coming from the Power Platform, the integration between the Apps for Dynamics 365 are now just a few setup to achieve your goal. Of course it was clearly on the Model Driven Apps (CE, Field Service, Marketing etc..) that Microsoft have put a lot of efforts to had one common data model and connect Dynamics365 apps each others on a simple way. But, ERP (aka FinOps Apps) was clearly (again ?) the last App to be able to do that. But now, here we are ! 2020 will be the year of CDS and CDM, especially on FinOps project. With the strategy for Microsoft, to give us updates every month on the One Version of FinOps (10.x) I know that a lot of features will come soon to close the loop between CRM and ERP project with Dynamics.
First of all, before we start, the setup of a dual-write connection has the following requirements:
- Finance and Operations apps that have build version 10.0.9 and platform update 33 or later
- Model-driven apps in Microsoft Dynamics 365 that have platform version 9.1.0000.11732 or later
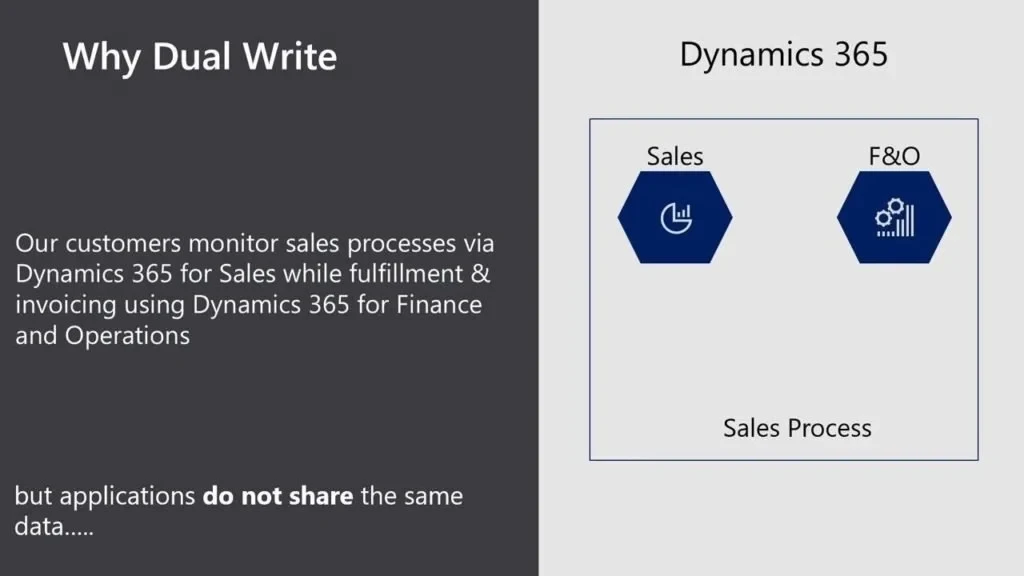
Before jumping also on the How-To handle that, maybe a quick Business Cases to explain the goal of this new feature.
Dual Write Overview
Dual Write is the magic that Microsoft has created that allows near real time syncing of data between CDS and F&O auto-magically! Dual Write provides a tightly coupled near-real time and bi-directional integration between Dynamics 365 Finance and Operations and Dynamics 365 Sales. Once an entity is enabled for Dual Write, any create, update change in Dynamics 365 Finance and Operations results in writes, in near-real time, to the Common Data Service and vice versa.
For example, a change in the Customer entity in Dynamics 365 Finance and Operations is reflected in near-real time in the Account entity in the Dynamics 365 Sales and vice-versa. While all this happens with minimal setup, an advanced user interface is provided with drag and drop mapping and transformation capabilities for all your customization needs. Quite magical!
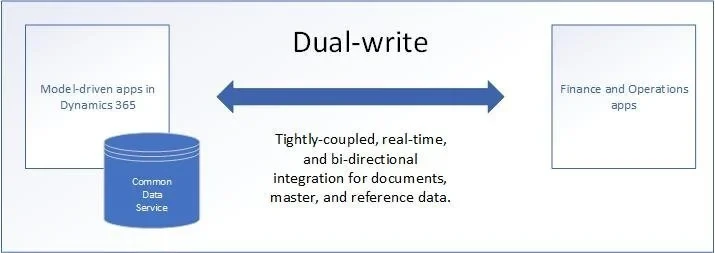
What is dual-write?
Dual-write is an out-of-box infrastructure that provides near-real-time interaction between model-driven apps in Microsoft Dynamics 365 and Finance and Operations apps. When data about customers, products, people, and operations flows beyond application boundaries, all departments in an organization are empowered.
Dual-write provides tightly coupled, bidirectional integration between Finance and Operations apps and Common Data Service. Any data change in Finance and Operations apps causes writes to Common Data Service, and any data change in Common Data Service causes writes to Finance and Operations apps. This automated data flow provides an integrated user experience across the apps.
INFRASTRUCTURE
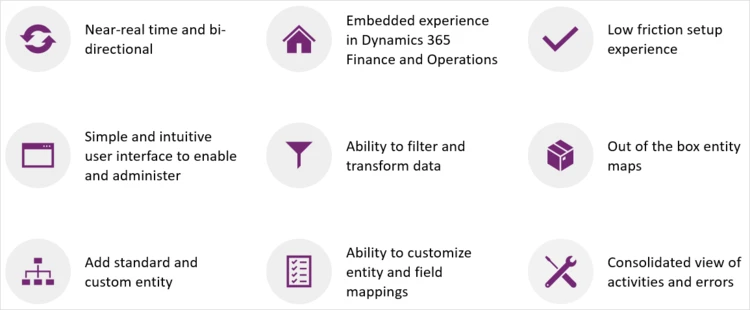
The dual-write infrastructure is extensible and reliable, and includes the following key features:
- Synchronous and bidirectional data flow between applications
- Synchronization, together with play, pause, and catchup modes to support the system during online and offline/asynchronous modes.
- Ability to sync initial data between the applications
- Consolidated view of activity and error logs for data admins
- Ability to configure custom alerts and thresholds, and to subscribe to notifications
- Intuitive user interface (UI) for filtering and transformations
- Ability to set and view entity dependencies and relationships
- Extensibility for both standard and custom entities and maps
- Reliable application lifecycle management
- Out-of-box setup experience for new customers
APPLICATION
Dual-write creates a mapping between concepts in Finance and Operations apps and concepts in model-driven apps in Dynamics 365. This integration supports the following scenarios:
- Integrated customer master
- Access to customer loyalty cards and reward points
- Unified product mastering experience
- Awareness of organization hierarchy
- Integrated vendor master
- Access to finance and tax reference data
- On-demand price engine experience
- Integrated prospect-to-cash experience
- Ability to serve both in-house assets and customer assets through field agents
- Integrated procure-to-pay experience
- Integrated activities and notes for customer data and documents
- Ability to look up on-hand inventory availability and details
- Project-to-cash experience
- Ability to handle multiple addresses and roles through the party concept
- Single source management for users
- Integrated channels for retailing and marketing
- Visibility into promotions and discounts
- Request-for-service functions
- Streamlined service operations
Top reasons to use dual-write
Dual-write provides data integration across Microsoft Dynamics 365 applications. This robust framework links environments and enables different business applications to work together. Here are the top reasons why you should use dual-write:
- Dual-write provides tightly coupled, near-real-time, and bidirectional integration between Finance and Operations apps and model-driven apps in Dynamics 365. This integration makes Microsoft Dynamics 365 the one-stop shop for all your business solutions. Customers who use Dynamics 365 Finance and Dynamics 365 Supply Chain Management, but who use non-Microsoft solutions for customer relationship management (CRM), are moving toward Dynamics 365 for its dual-write support.
- Data from customers, products, operations, projects, and the Internet of Things (IoT) automatically flows to Common Data Service through dual-write. This connection is very useful for businesses that are interested in Microsoft Power Platform expansions.
- The dual-write infrastructure follows the no-code/low-code principle. Minimal engineering effort is required to extend the standard table-to-table maps and to include custom maps.
- Dual-write supports both online mode and offline mode. Microsoft is the only company that offers support for online and offline modes.
What does dual-write mean for users and architects of CRM products?
Dual-write automates the data flow between Finance and Operations apps and Common Data Service. In future releases, concepts in model-driven apps in Dynamics 365 (for example, customer, contact, quotation, and order) will be scaled to mid-market and upper-mid-market customers.
In the first release, most of the automation is handled by dual-write solutions. In future releases, those solutions will become part of Common Data Service. By understanding the upcoming changes to Common Data Service, you can save yourself effort in the long term. Here are some of the crucial changes:
- Common Data Service will have new concepts, such as company and party. These concepts will affect all apps that are built on Common Data Service, such as Dynamics 365 Sales, Dynamics 365 Marketing, Dynamics 365 Customer Service, and Dynamics 365 Field Service.
- Activities and notes are unified and expanded to support both C1s (users of the system) and C2s (customers of the system).
- Here are some of the upcoming changes in Common Data Service:
- The decimal data type will replace the money data type.
- Date effectivity will support past, present, and future data in the same place.
- There will be more support for currency and exchange rates, and the Exchange Rate application programming interface (API) will be revised.
- Unit conversions will be supported.
So… now let’s go ahead and let’s do just setup as NoCode/LowCode #PowerAddicts users 🙂
You can set up a dual-write connection between a Finance and Operations environment and a Common Data Service environment.
- A Finance and Operations environment provides the underlying platform for Finance and Operations apps (for example, Microsoft Dynamics 365 Finance, Dynamics 365 Supply Chain Management, Dynamics 365 Retail, and Dynamics 365 Human Resources).
- A Common Data Service environment provides the underlying platform for model-driven apps in Dynamics 365 (Dynamics 365 Sales, Dynamics 365 Customer Service, Dynamics 365 Field Service, Dynamics 365 Marketing, and Dynamics 365 Project Service Automation).
The setup mechanism varies, depending on your subscription and the environment.
- For new instances of Finance and Operations apps, the setup of a dual-write connection begins in Microsoft Dynamics Lifecycle Services (LCS). If you have a license for Microsoft Power Platform, you will get a new Common Data Service environment if your tenant doesn’t have one.
- For existing instances Finance and Operations apps, the setup of a dual-write connection begins in the Finance and Operations environment. (In the Data Management Workspace)
For the FinOps part, now you can go to LCS Dynamics if you want to deploy a new environment, you can setup CDS directly (for NEW INSTANCE) :
Set up a dual-write connection
Follow these steps to set up the dual-write connection.
- In LCS, go to your project.
- Select Configure to deploy a new environment.
- Select the version.
- Select the topology. If only one topology is available, it’s automatically selected.
- Complete the first steps in the Deployment settings wizard.
- On the Common Data Service tab, follow one of these steps:
- If a Common Data Service environment is already provisioned for your tenant, you can select it.
- Set the Configure Common Data Service option to Yes.
- In the Available environments field, select the environment to integrate with your Finance and Operations data. The list includes all environments where you have admin privileges.
- Select the Agree check box to indicate that you agree to the terms and conditions.
- If a Common Data Service environment is already provisioned for your tenant, you can select it.

If your tenant doesn’t already have a Common Data Service environment, a new environment will be provisioned.
- Set the Configure Common Data Service option to Yes.
- Enter a name for the Common Data Service environment.
- Select the region to deploy the environment in.
- Select the default language and currency for the environment. NoteYou can’t change the language and currency later.
- Select the Agree check box to indicate that you agree to the terms and conditions.

- Complete the remaining steps in the Deployment settings wizard.
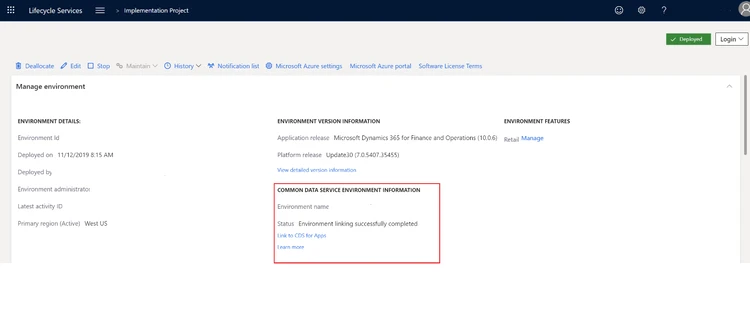
- After the environment has a status of Deployed, open the environment details page. The Common Data Service environment information section shows the names of the Finance and Operations environment and the Common Data Service environment that are linked.
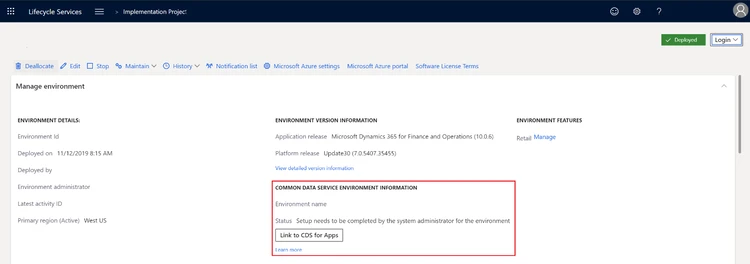
- An admin of the Finance and Operations environment must sign in to LCS and select Link to CDS for Apps to complete the link. The environment details page shows the admin’s contact information.After the link is completed, the status is updated to Environment linking successfully completed.
- To open the Data integration workspace in the Finance and Operations environment and control the templates that are available, select Link to CDS for Apps.
If you are like me with already instances of FinOps deployed, you can go directly to your instance on the Data Management Workspace !
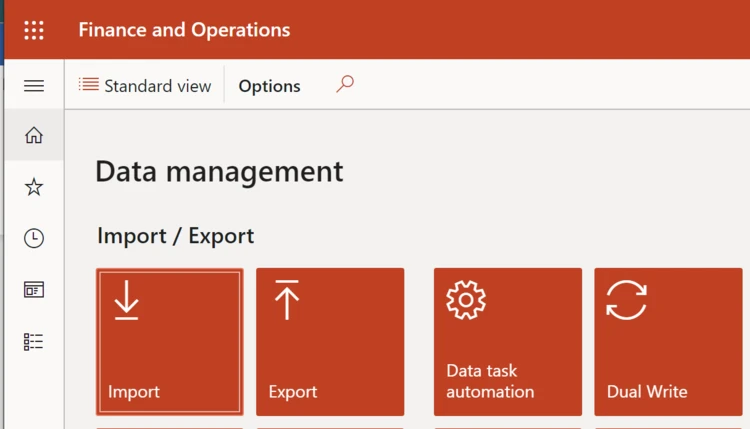
Click on Dual-Write and New Link to Environment.
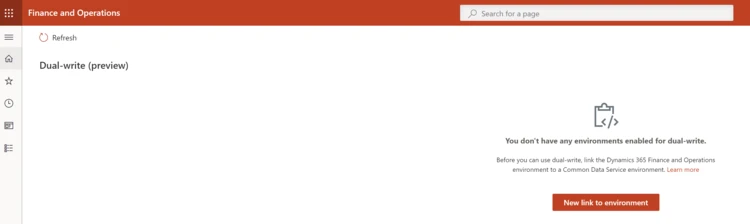
Choose your CDS environment.

Select all legal entities for FinOps that you want to be sync.
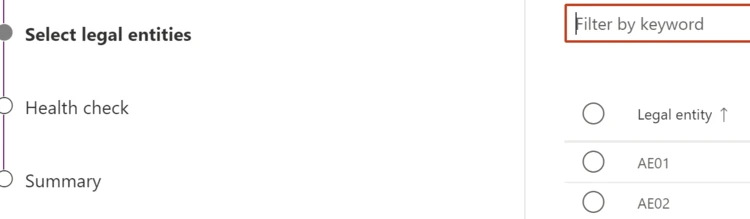
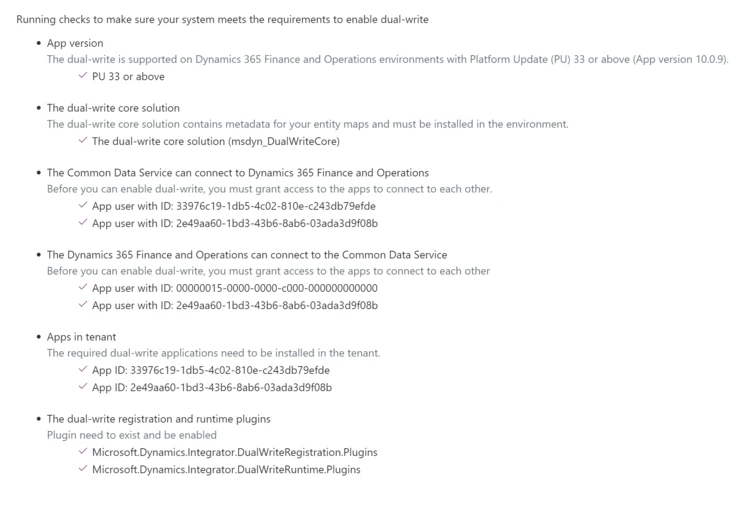
After you will have a checklist… and here you will have some errors like me… 🙂

So… now how to resolve all these errors ?
Well, I’m happy to share with you how to do so in just few minutes (really challenging to discover so you will save a lot of times to not search everywhere, believe me.
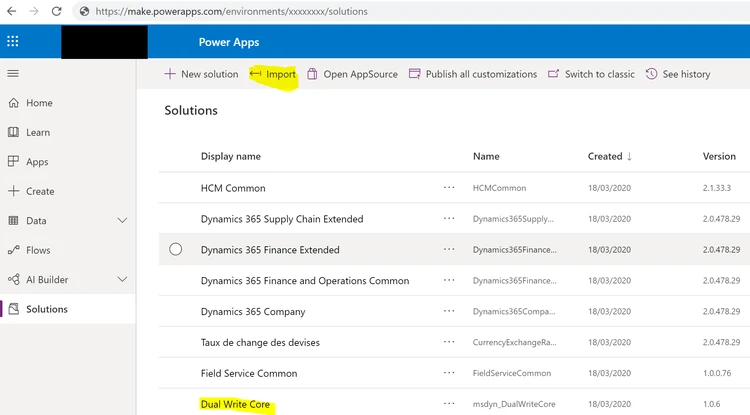
First of all, you will need to download this solution “msdyn_DualWriteCore” here : MSDYN_DUALWRITECORE SOLUTION.
After you have to go to your Power Platform Admin Center to import this solution to your CRM instance.
After, you will need to deploy some others solutions that are mandatory to sync correctly FinOps entities to CRM entities / Field Services entities and so on.
So, for that, download this package first : DYNAMICS365 FINOPS PACKAGE DEPLOYER
You will need also the CRM package deployer in order after to deploy theses packages to your CDS.
Here is the link to achieve that : https://docs.microsoft.com/en-us/power-platform/admin/deploy-packages-using-package-deployer-windows-powershell#PD_tool
· Extract the package zip file and copy all the below files from the folder Dynamics365FinanceAndOperationsCommon.PackageDeployer.2.0.438.

· Paste all the copied files into the ‘Tools’ folder of the package deployer tool installed (the package deployer tool version can be anything latest). Run the ‘PackageDeployer.exe’ to select the CDS environment and install the solutions.
Now everything are now installed correctly. Last steps are to solve security issues.
For this problem that you had before :
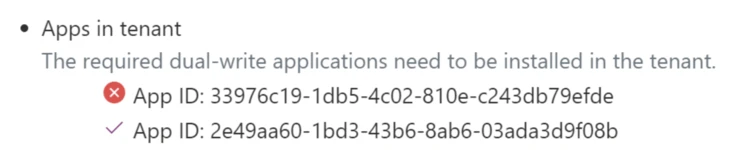
You will just need to launch this LINK, connected with an Administration Rights account in your tenant.
o Launch URL below with your admin credentials which should prompt you for consent.
o Click ‘Accept’. This would mean that you are providing the consent to install the app (with id =33976c19-1db5-4c02-810e-c243db79efde) in your tenant.
o This app is required for CDS to talk to F&O Note: If this doesn’t work, open browser in incognito mode for chrome and private mode of Edge.
After all done, you will be redirected on this website, and it will be OK, you can close it.

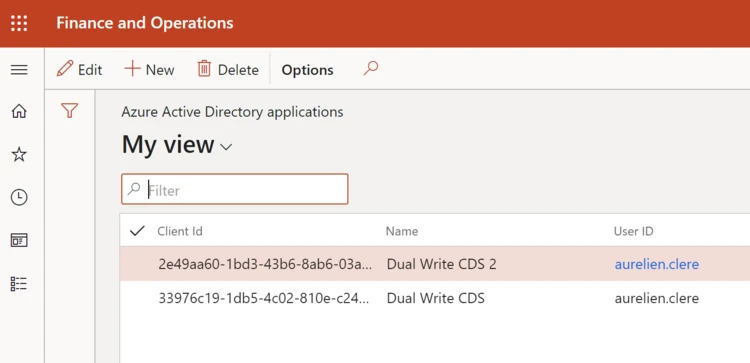
Now, go to your FinOps tenant again and we will need to create Azure Application User. This step is here to solve this problem :

In order to resolve that, you have to go this menu item in FinOps :
1. Launch your Dynamics 365 for Finance and Operations instance with this URL https://<>/?cmp=DAT&mi=SysAADClientTable (substitute with your instance)
After create 2 inputs with theses App users ID that we have just before.
Last step, go your CRM instance to solve this last issue :

1. Go to Settings/Security and click on Users
2. Switch to Application Users and create new Users (don’t forget to switch after the form to : Application user)
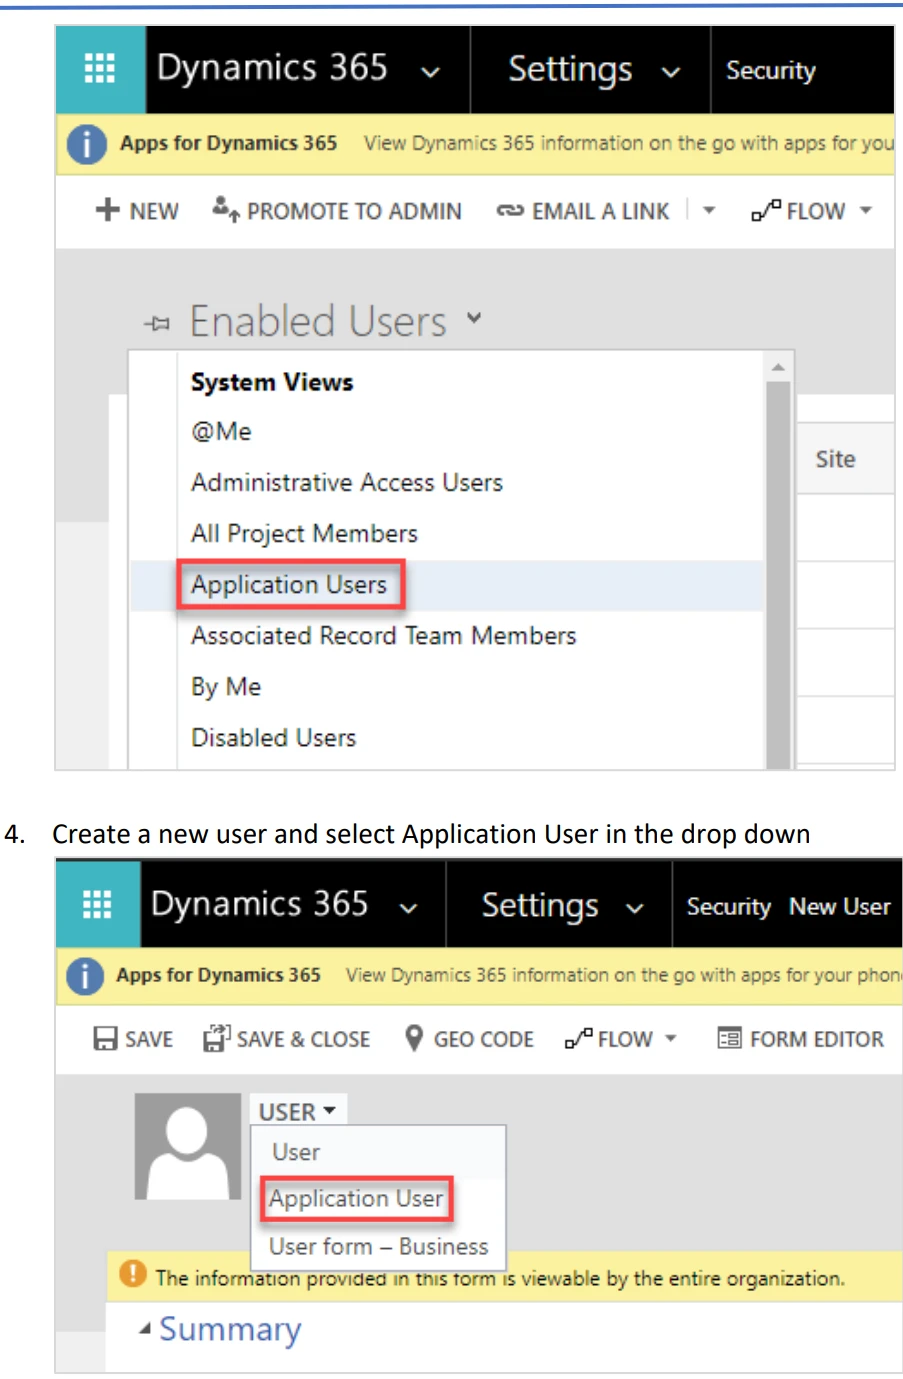
1. Add Application id – 00000015-0000-0000-c000-000000000000 and follow prompts to fill additional fields and save user account This Application Id is for F&O , this will allow F&O application to connect to Sales/CDS.
2. Provide any email id (it doesn’t matter if it’s valid or not)
3. Provide ‘System Administrator’ rights to Application User via Manage Roles

Also don’t forget also to go to your Team Security in the CRM and add “Administrative roles” to your Business Unit Team.
And here we are, finish 🙂 if you want I have also a Word documentation to summarize the HowTo ; step by step. HOW-TO STEP BY STEP WORD DOCUMENTATION
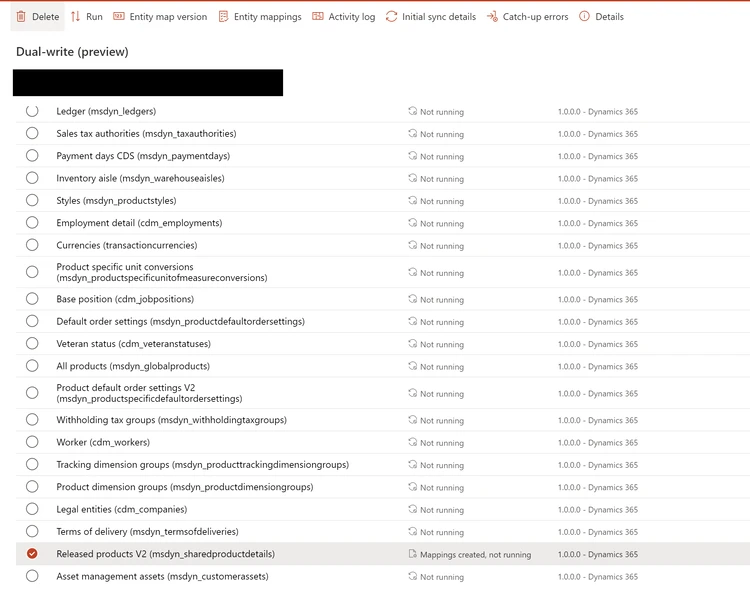
Remember we were before on FinOps to setup the Dual Write. You can go back there now and re-run the check list.
Click after on Create and you will be redirected to here after :

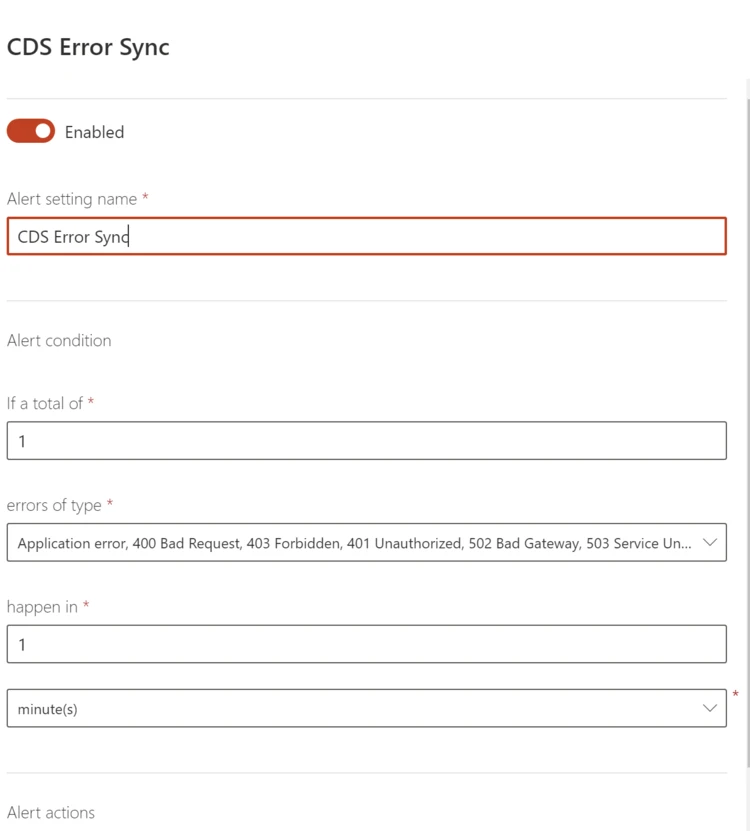
Before going to setup now the Entity mapping between CRM and the ERP, you can also check before the part Environment Details, Health Check and also a good feature is Alert settings in order to send email when something went wrong.
Before jumping to the mapping between CRM and ERP apps, here is a good article from Microsoft that you have to understand and read carefully about the architecture behind the scene, since the ERP and the CRM structure are not bascially the same thing on each entity (like Legal Entity versus Business Unit, Products and so on) LEARN MORE
Now, go to the button “Apply solution”

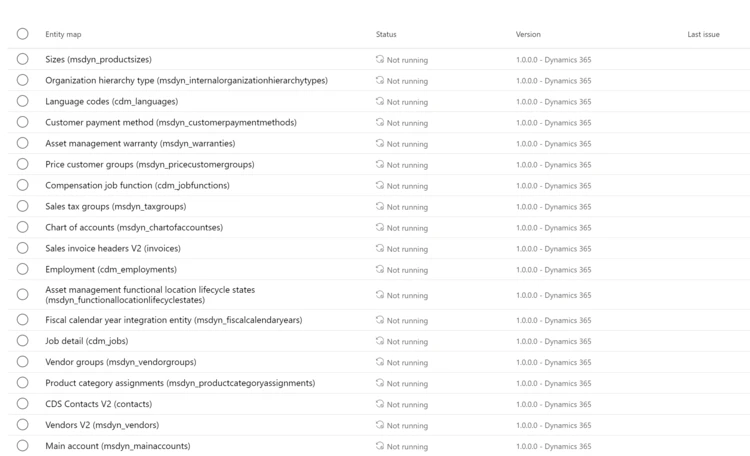
Like below you will see all the entities mapping you have from Microsoft solutions packages you had imported before in your CDS. Of course this is the standard one, and you can customize it on your own. Change the standard one, create new one (thing of : custom entities from FinOps & CRM you want maybe to sync in the CDS)
You can go also on one of entity mapping like this one “Invoice” :
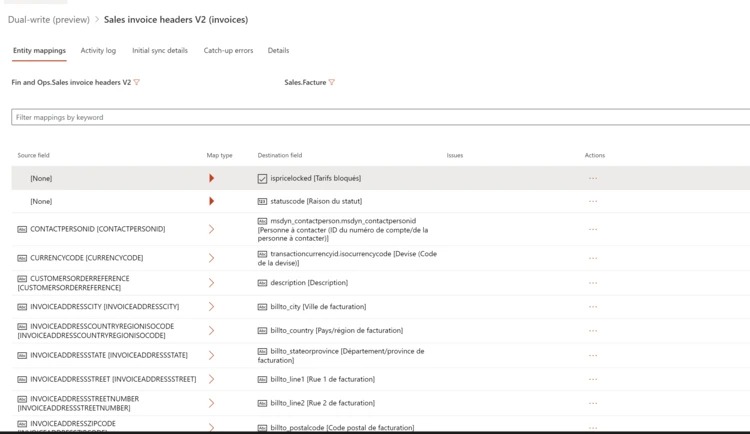
You can put your custom fields in the mapping, change the order (bi-directional or uni-directional : map type) , remove a field mapping etc….
Now, to launch your first SYNC, select one entity like Products (master data) and click on “RUN”
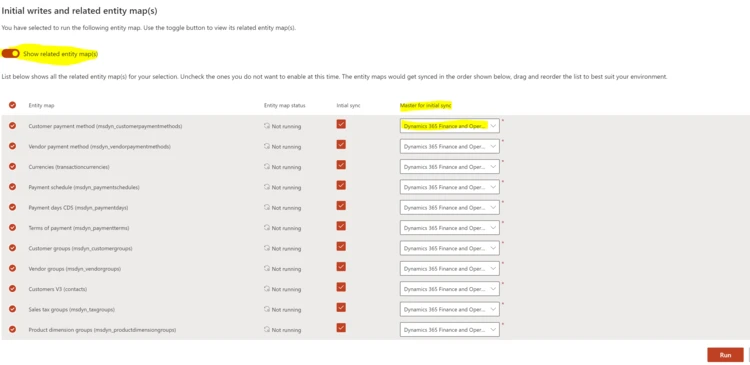
The initial write open, and click on “Show Related Entity map(s)” , so that CDS will sync also related entity based on the product. Don’t forget also to check your Master for Initial Sync. Like me my FinOps is my MASTER source of my Data so I prefer to set it like this. Of course it won’t erase previous data from your CRM instance if you had some before.
Click after on “RUN” and wait some minutes !
Of course, now after the initial SYNC the goal is to check if I update an account on the CRM doest it change automatically on FinOps and vice-versa.
Before you had to check if your entity is on “Running” state after the completion of the first initial SYNC. You can also pause & stop any Running state entity sync.

Here we are in my CRM, I’ve got the same accounts – contacts of my FinOps system.
If I change like the phone number & email address of a Contact in my CRM system like this
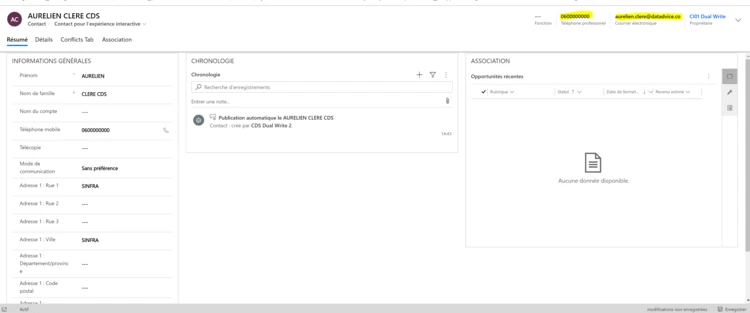
In FinOps we’ve got in a matter of a second, my contact updated !

Now that all your DATA are on the CDS, you can achieve a lot more !!! Like this central master entity : CURRENCY

Indeed, ,now you can like of course setup a Datalake export of your CDS entities, it will be a good point to start analyze your CENTRAL data / unique database coming from all other your Dynamics 365 Apps like here the CRM and the ERP together. (aka Project Athena)
You can also setup some FLOW with PowerAutomate on your CDS entities, and also setup a Dataflow for PowerBI on your datalake of CDS.
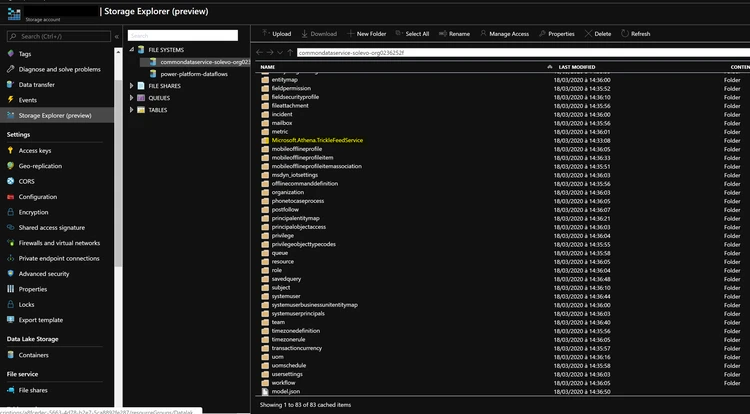
On your CDS click “Export Link to Datalake”
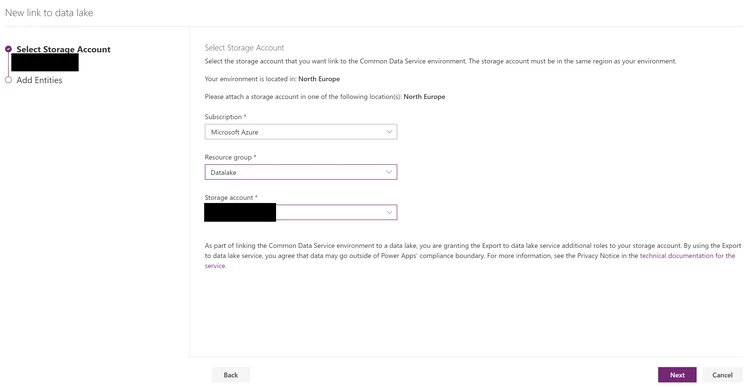
And after few minutes check your Datalake in Azure :
But, don’t forget to read my previous article about the datalake !DATALAKE ARTICLE
Also last part, is about Field Service Apps. Indeed, we can also setup a CDS dual write between FinOps and Field Service for the Supply Chain Management.
You can read more here :FIELD SERVICE ARTICLE
Hope you like it. I just setup this SYNC in a matter of an afternoon. So this is the major step to sync each Dynamics365 apps each other with the CDS and the Common Data Model (CDM) and achieve more after with Flow, PowerBI and so on ! Really appreciate that Microsoft ! Thank you 🙂